前回は以下のような記事を書きましたが、今回はファイル名の一部をアップロード先のS3パスに使用する方法を試してみます。
Fluentd等の設定は過去記事を参照ください。
www.capybara-engineer.com
以下の記事を参考にしました。
yomon.hatenablog.com
環境
Windows Server 2019
Td-agent v3.8.0
実施作業
結論
以下のconfファイルを使用すれば今回やりたいことができます。
下記の手順はこのconfファイルができるまでの過程を書いてます。
<source>
  @type tail
  path C:/data/test-data.csv.*
  pos_file C:\var\log\td-agent\test-data.csv.pos
  read_from_head true

  <parse>
    @type csv
    keys sepal_length,sepal_width,petal_length,petal_width
    types sepal_length:float,sepal_width:float,petal_length:float,petal_width:float
  </parse>

  tag s3.data.csv.*
</source>

<match s3.*.*.**>
  @type s3

  <assume_role_credentials>
    role_arn          arn:aws:iam::************:role/test-bation
    role_session_name test-bation
  </assume_role_credentials>

  s3_bucket test-temp-2021
  s3_region ap-northeast-1
  path fluentd

  s3_object_key_format %{path}/%{time_slice}/${tag[-1]}/${tag[1]}_%{hms_slice}.json.%{file_extension}
  time_slice_format year=%Y/month=%m/day=%d
  overwrite true

  <buffer tag,time>
    @type file
    path C:\var\log\td-agent\s3
    timekey 10s  # 3 min
    timekey_wait 1m
    chunk_limit_size 30m

    compress gzip
  </buffer>
  <format>
    @type json
  </format>
</match>
準備
以下のような名前のファイルを作成します。
このTESTの部分がS3パスに設定される想定です。
test-date.csv.TEST

修正後のconfファイルがこちらです。
<source>
  @type tail
  path C:\data\test-data.csv.*
  pos_file C:\var\log\td-agent\test-data.csv.pos
  read_from_head true

  <parse>
    @type csv
    keys sepal_length,sepal_width,petal_length,petal_width
    types sepal_length:float,sepal_width:float,petal_length:float,petal_width:float
  </parse>

  tag s3.data.csv.*
</source>

<match s3.*.*.*>
  @type s3

  <assume_role_credentials>
    role_arn          arn:aws:iam::************:role/test-bation
    role_session_name test-bation
  </assume_role_credentials>

  s3_bucket test-temp-2021
  s3_region ap-northeast-1
  path fluentd

  s3_object_key_format %{path}/%{time_slice}/${tag[3]}/${tag[1]}_%{hms_slice}.json.%{file_extension}
  time_slice_format year=%Y/month=%m/day=%d
  overwrite true

  <buffer tag,time>
    @type file
    path C:\var\log\td-agent\s3
    timekey 10s  # 3 min
    timekey_wait 1m
    chunk_limit_size 30m

    compress gzip
  </buffer>
  <format>
    @type json
  </format>
</match>
修正した点として、3行目のpathと13行目のtag、28行目のs3_object_key_formatの3か所です。
アップロード先のS3バケットは既に作成済みのものを使用します。
コマンド実行
Td-agentプロンプトを立ち上げて、プロセスを実行するコマンドを実行してみます。
$ fluentd -c etc\td-agent\td-agent.conf
何故か処理が進んでいきません。

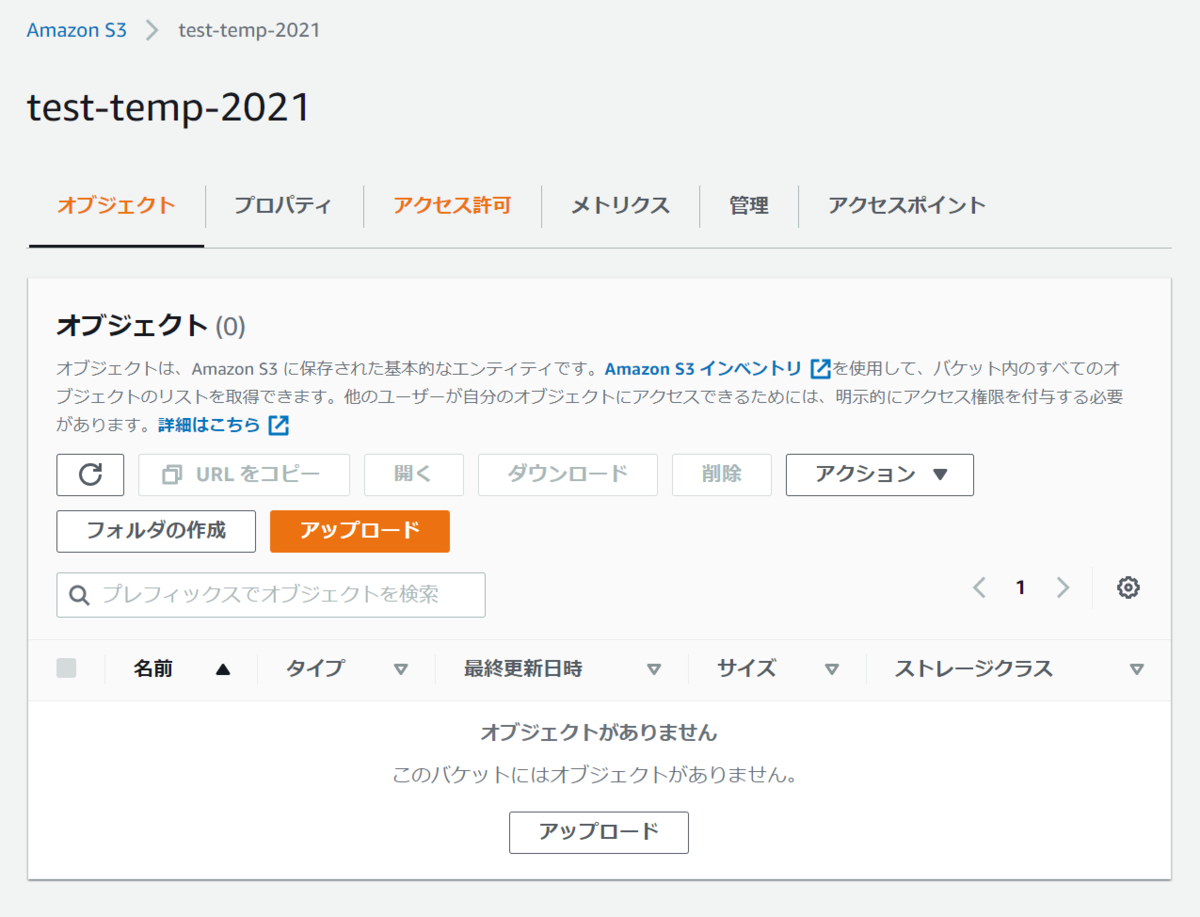
S3を確認してみましたが、ファイルはアップロードされていないようです。

原因調査
Fluentdのtailプラグインのページを読んでいると原因っぽい記述がありました。
docs.fluentd.org
英文
Wildcard pattern in path does not work on Windows, why?
The backslash (\) with * does not work on Windows by internal limitations. To avoid this, use slash style instead:
日本語訳
Windowsでパスのワイルドカードパターンが使えないのですが。
Windowsでは、内部的な制限により、*を含むバックスラッシュ(R)が動作しません。これを回避するには、スラッシュを使用してください。
どうやらPathに\マークを使用しているのが原因でPathが正しく認識されないようです。
ワイルドカードを付けない場合は正常に動作するので、WindowsでPathにワイルドカードを使用する場合は注意が必要です。
confファイルのPathの部分を\から/に修正して再度実行してみます。(posファイルは念のため手動で削除しています)
<source>
  @type tail
  path C:/data/test-data.csv.*
  pos_file C:\var\log\td-agent\test-data.csv.pos
  read_from_head true

  <parse>
    @type csv
    keys sepal_length,sepal_width,petal_length,petal_width
    types sepal_length:float,sepal_width:float,petal_length:float,petal_width:float
  </parse>

  tag s3.data.csv.*
</source>
~~
今度はログにファイルパスが表示されているので、正しく処理がされていそうです。
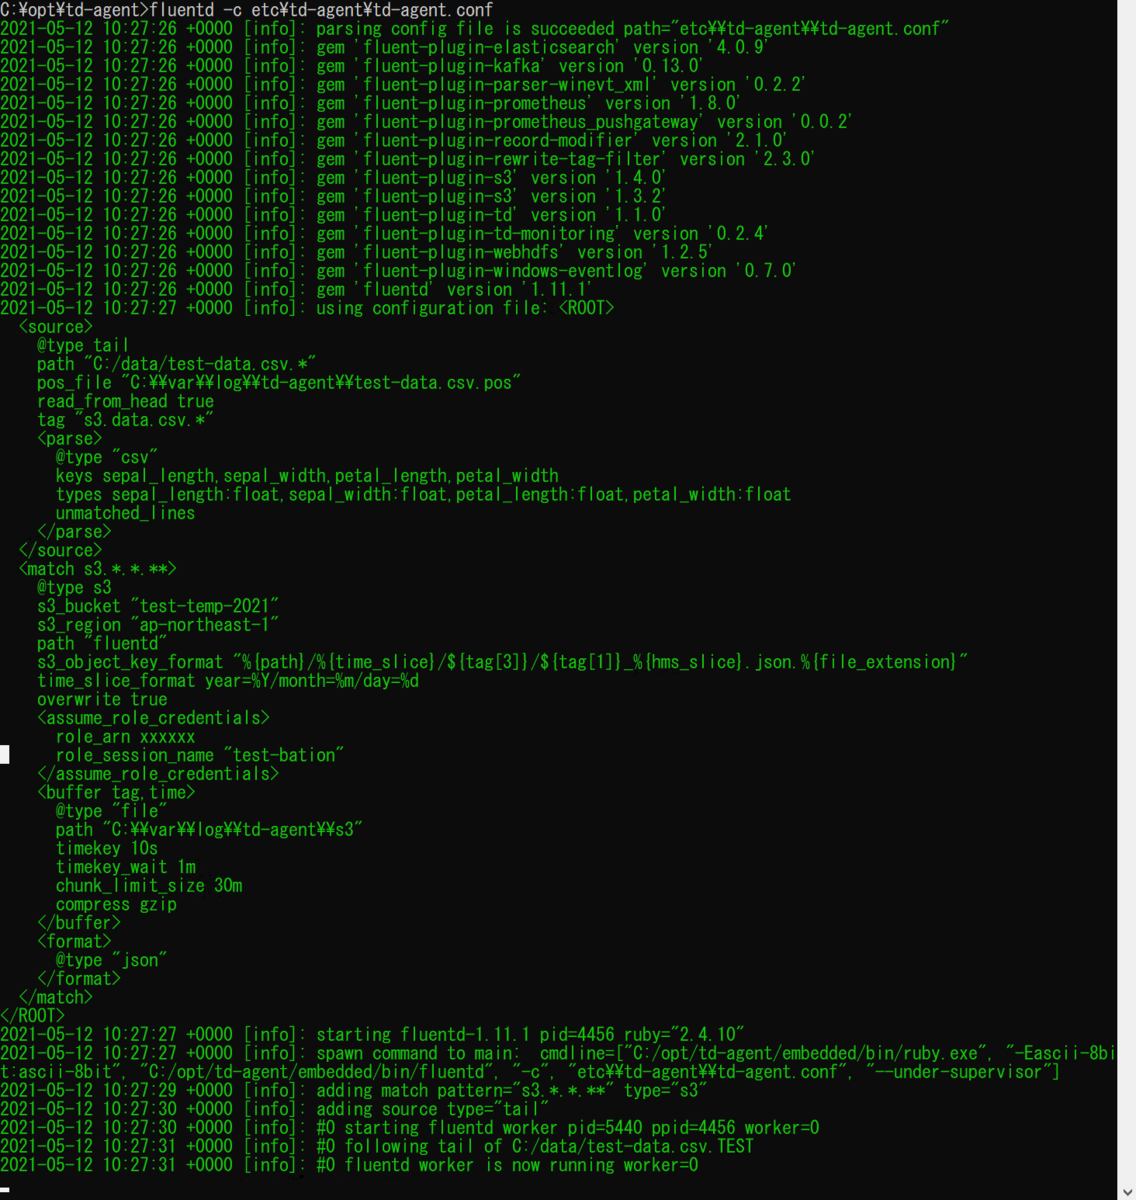
S3を見るとファイルはアップロードされていましたが、パス名に"C:/"が設定されていました。
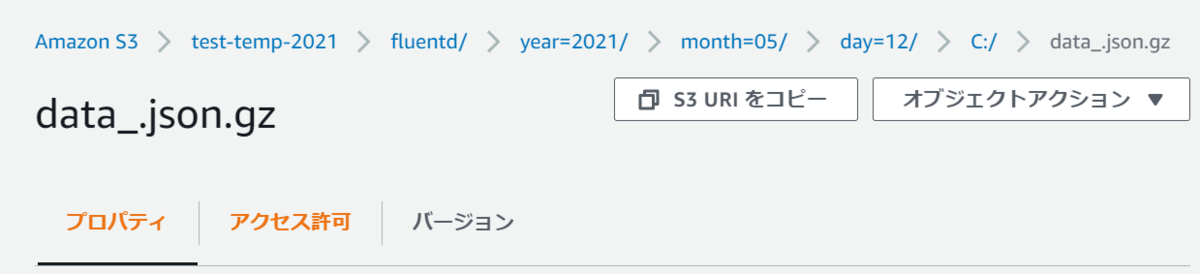
ワイルドカードを使用した場合はPath全体がtagに設定されるようなので、今回だと[s3.data.csv.C:.data.test-data.csv.TEST]となっているようです。
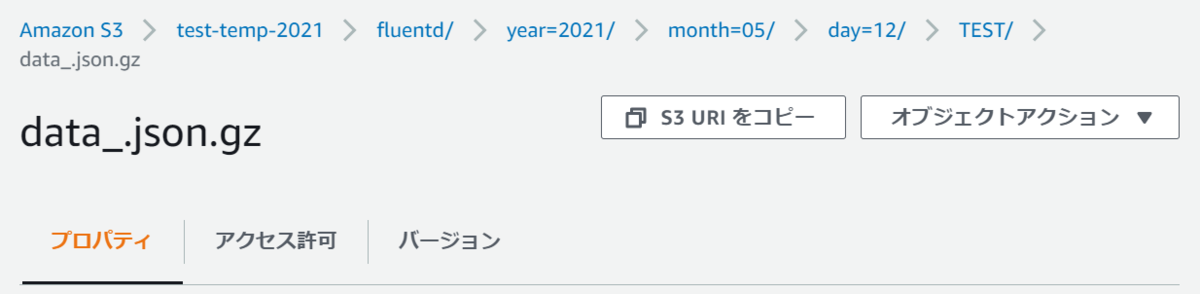
なので、confファイルのs3_object_key_format を以下のように修正して再度実行します。
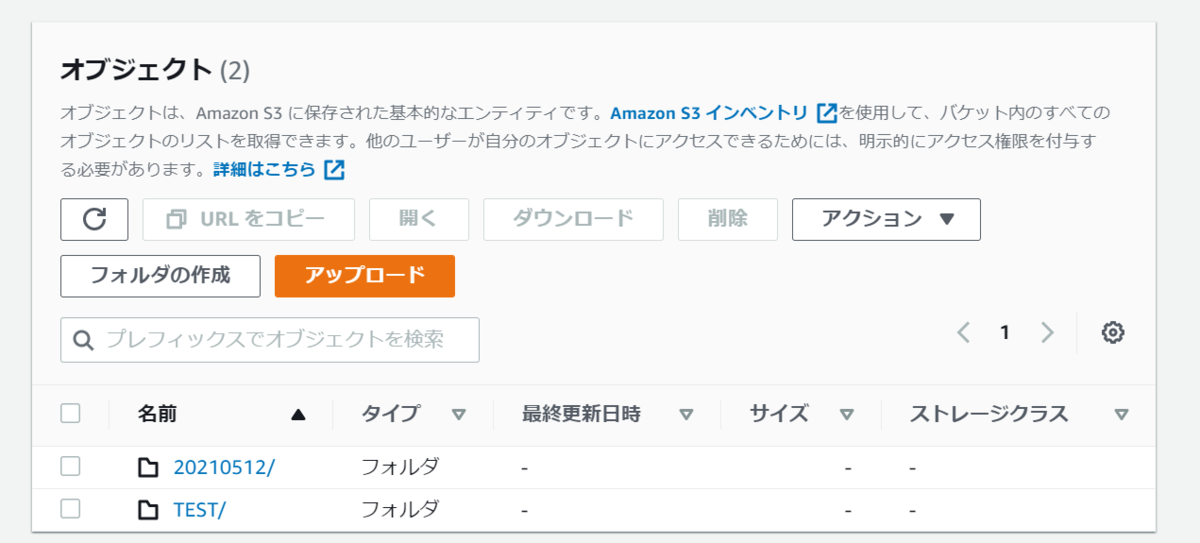
S3を確認すると今度は想定通りファイル名の一部がS3のパスに設定されていました。
これでファイルの名前によって出力先を指定することができそうです。
ちなみに。。。
ワイルドカードで対象となるファイルが複数あった場合を試してみました。
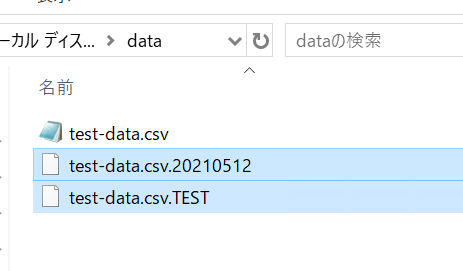
ファイルが複数あった場合はフォルダも複数作成されていました。
試しに片方のファイルだけ手動でレコードを追記してみます。

S3上のファイルはオーバーライドされているようです。


posファイルには対象となるファイルが記載されていました。

感想及び所感
ということで、Fluentdでファイル名の一部をS3のパスに設定してみました。
実はWindowsの\と/の部分で3時間は溶かしたので地味に疲れました。。